
Peripheral intravenous cannulation under ultrasound guidance is the placement of a cannula into a peripherally-located vein under the direct vision of ultrasound. This process allows the cannulation of veins that are unable to be visualised or palpated without ultrasound. In trained individuals this method of cannulation results in higher first-pass and overall success rates with fewer complications 1,2.
On this page:
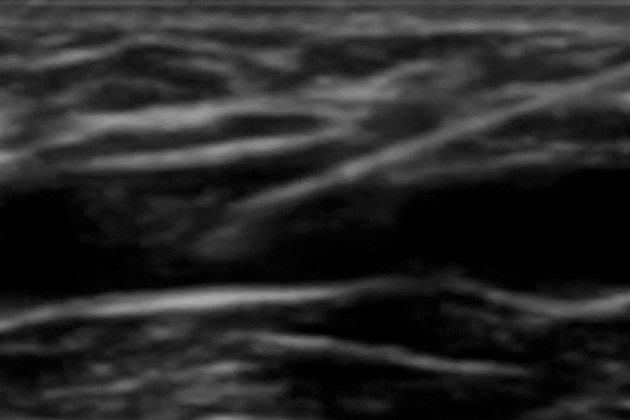
Images:
Indications
For cannulation in general:
repeated blood sampling
IV administration of fluids, contrast, medications, chemotherapy, nutritional support, blood or blood products
For ultrasound-guided cannulation specifically:
-
unable to visualise or palpate veins due to
body habitus
oedematous skin
multiple unsuccessful blind insertion attempts
severe dehydration
multiple previous cannulations (e.g. intravenous drug use, chemotherapy)
Contraindications
No absolute contraindications but avoid intravenous cannulation if:
previous lymphoedema/lymph node dissection of that limb
local burns
local injury
local infection
Procedure
Preprocedural evaluation
-
review indications for peripheral cannulation 4
assists with the decision of what gauge cannula to use
review relevant past medical history
Positioning/room set up
Patient
comfortably lying or sitting
arm well supported; arm board (if available) with the limb abducted and externally rotated
adequate exposure for clean field
Operator
ergonomically positioned: sitting or standing
align ultrasound monitor, patient and patient's peripheral access point within the operator's line of sight
equipment close, reachable and in order to be used
Equipment
-
ultrasound machine
linear transducer (7.5-10 MHz): superficial structures
curvilinear transducer (2-5 MHz): deeper structures
probe cover
sterile gel 4
tourniquet
gloves
cannula bung
syringe of normal saline (flush)
skin preparation - alcohol/antiseptic wipes
-
cannula
check required flow rate to determine gauge required
standard vs longer cannula dependant on the depth of vein being accessed
adhesive transparent dressing (e.g. Tegaderm)
+/- blood vials for pathology (as required)
Technique
Initial scout
Using the ultrasound survey potential vessels for cannulation 4.
-
start in the antecubital fossa with a transverse probe
-
upper limb venous targets: basilic, brachial, and/or cephalic veins
the basilic vein, while variably present, lacks flanking arteries and nerves, and is usually the more superficial target
in contrast the deep brachial vein is near ubiquitously present, but has nerves and arteries in close proximity, and is found at a greater depth
-
-
confirm identified vessel is venous 4
patent peripheral veins easily and completely collapse with gentle probe compression
non-pulsatile
colour Doppler can be used if available
pulsed wave Doppler also can be used to demonstrate the pulsatile flow pattern in adjacent arteries and the non-pulsatile, phasic flow in veins
-
appropriate vein
-
large diameter, achievable depth, straight path 4
using a standard 48 mm angiocatheter, success rate drops to 0% when vessel depth is above 1.6 cm 3
no significant difference between more superficial veins at different depths
-
linear increase in success with increasing venous diameter
56% when less than or equal to 0.3 cm
92% when greater than or equal to 0.6 cm
desirable targets are, therefore, found between 0.3 cm and 1.5 cm from the surface, with an internal diameter of at least 0.4 cm 4
note and avoid venous valves
-
Preparation
clean probe after initial scout
place a cover directly on the clean probe
apply a tourniquet to the upper aspect of the patients arm
prepare the skin over the previously identified venous target with alcohol/antiseptic wipe
Needle Insertion
gloves donned
-
US probe held in non-dominant hand with stable grip
apply sterile gel
-
check probe orientation
touch one end of probe and watch for reaction on monitor
align for use on patient so that medial is medial and lateral is lateral.
-
relocate venous target
-
probe approach
-
transverse
advantages: improved ability to centre needle to midline of vessel 4
disadvantages: loss of direct needle tip visualisation each time the probe or needle are moved
-
longitudinal
advantages: entire needle visualised throughout procedure with better perception of depth within the vessel 4
disadvantages: inability to identify if needle is off the midline of the vessel
-
optional confirmation of position prior to insertion of needle by placing needle between transducer and skin to illicit shadow artifact
note depth of vessel to approximate final insertion depth
-
-
insert needle through skin at a 45 degree approach angle
concentrate on monitor after initial insertion
find needle tip through fanning or small movements of ultrasound prior to further movement. Identifying the needle tip on ultrasound is important for cannulation success 5.
-
progressive targeted movement of needle towards vessel
1 mm movements at a time directed towards vessel
process of moving ultrasound probe forward off the needle tip, stabilising and then moving the needle further forward into the ultrasound's view
Confirmation of cannulation
-
visualisation of cannula and needle within the lumen of the vessel
on transverse orientation: bull's eye sign
on longitudinal orientation: needle seen entering and lying within lumen
-
a positive "saline flush test"
identify cannula in long axis and push 5-10 mL of saline
positive test is direct visualisation of bubbles within lumen
may be aided by colour Doppler 4
flashback of blood through cannula
The ultrasound probe can be put down at this point so that both hands can be used to advance the catheter, remove the needle, attach the bung, flush the cannula, clean the surrounding skin and secure in place with a transparent dressing.
Complications
In comparison to blinded techniques, complications associated with peripheral IV insertion under ultrasound guidance are typically minor but include:
nerve injury: median or median cutaneous nerve
arterial cannulation: highlights the importance of confirming venous characteristics on ultrasound prior to cannulation


 Unable to process the form. Check for errors and try again.